Getting Started 01: Valkyrie Startup and Intro to User Interface
This tutorial will teach you the basics to navigate through the Valkyrie Engine screens and create your very first app.
Create your first project in Valkyrie
Start the Valkyrie Launcher and you will get two tabs:
- Recent: the apps you have been working on will be displayed there.
- Templates: these are shortcut templates for you to select in order to create a new app. You can reconfigure the content at your will once opened.
Firstly, swap to the Templates tab and select the New Project tab. You will be prompted to select a template to create a new application.
To better understand the interactions in Valkyrie, we recommend that for your first trial you select the AnimMixer template. Once selected, a Create Project screen pops up. Select a Name for your application. Choose the directory where you want to save your app in the Location field & proceed by clicking on Create. The application will be created and saved in your documents. Note that by default, applications are located in C:/User/USER_NAME/Vlk Projects/ on Windows and /Users/USER_NAME/Vlk Projects on macOS.
Valkyrie User Interface
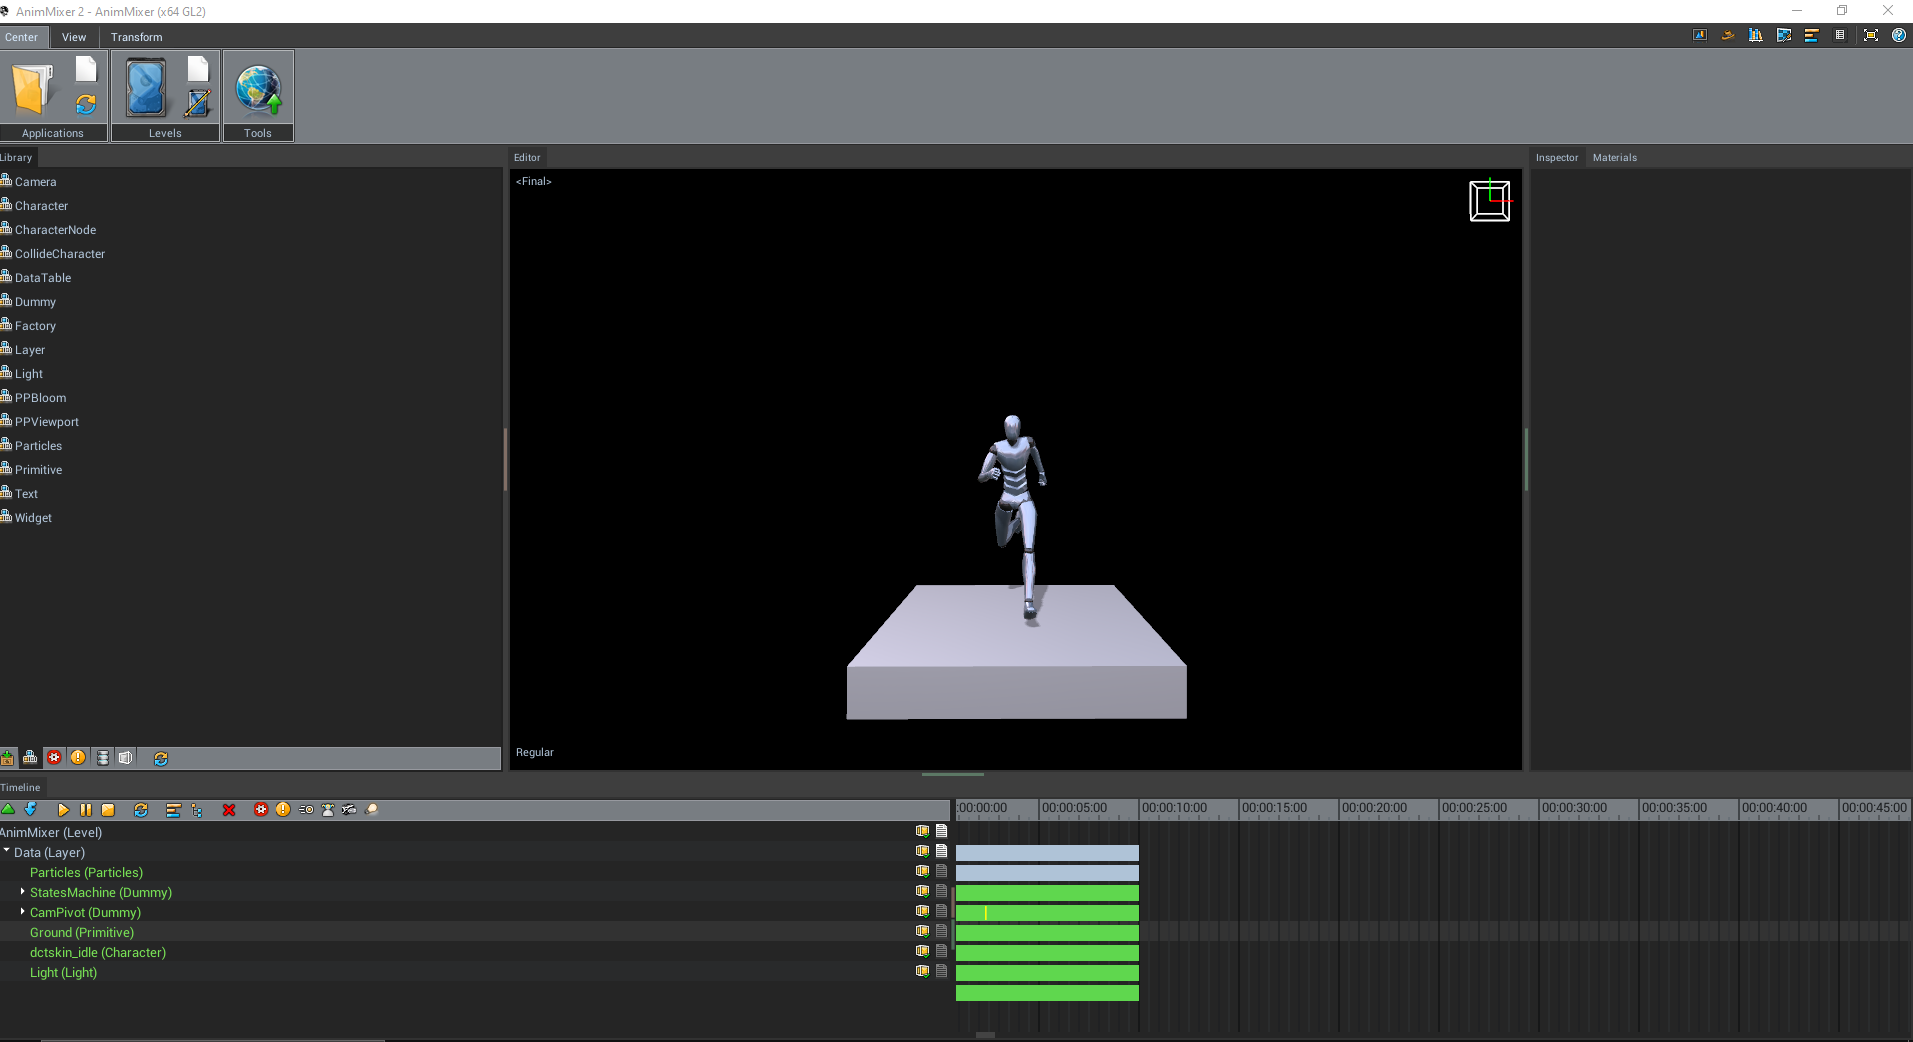
The Image above shows the default User interface Layout.
Project Manager & Viewport Tools


Located on the Top Left of the Screen, 3 major tabs.
A) Center (File Manager)
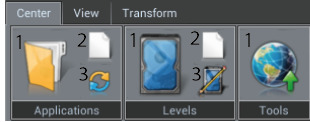
Application
- Open an existing project
- Create a New project
- Reload the open application
Levels
- Save Current Level
- Create new level
- Save the Current Level as
Tools
- Publish the Application
B) View (Viewport window)

Layout
- Set Single View
- Set Two View
Utils
- Move the Camera to the selected Entity
- Set to Fullscreen
- Display Selectable Icons
- Display Physic Bounding Box
Render Mode
- Set the regular render mode
- Set the VR render mode
- Set the AR render mode
C) Transform (Gizmo Setting)
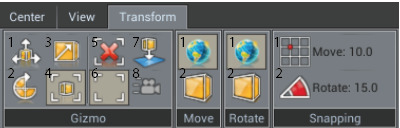
Gizmo
- Move Tool
- Rotate Tool
- Scale Tool
- Selection Tool
- Clear Selection
- Show the Selection Box
- Ground the Entity
- Transfer WorkCamera Translation to elecr
Move & Rotate
- Set to World Axis
- Set to Mesh (Local) Axis
Snapping
- Move Angular Snap
- Rotate Angular Snap
Library Overview
The Library menu allows you to import assets inside your application and it is split into 7 tabs:

A) Levels
- Your project will be saved as a Level and displayed in this tab. If your scenes are complex, you can split them into different levels and call them individually via a master level.
- To change between levels, drag the selected level from the library and drop it in the timeline
- We recommend in addition that you save your work in progress incrementally under new levels so that you can go back to a previous iteration if anything goes wrong.
- Modifying attributes in a later iteration does not affect previous iterations.
- All iterations / levels will be displayed in this tab.
B) Entities
- The Entities tab is used to create built-in assets such as Camera, Mesh & Lights.
For a full list, Click Here for Entity
C) Actions
- This tab contains a list of Actions that allow you to create interactions of various complexities. It features a visual logic engine that will empower you to create anything your mind can think of without writing a single line of code.
For the full list, Click Here for Action
D) Events
- Events are a set of conditions that allow you to define when Actions are triggered. Such as User input via virtual button, or to trigger an animation when a character collides with an asset.
For the full list, Click Here for Event
E) Data
- The Data tab contains all of the imported assets. To import an element, simply copy it in the C:\Users\USER_NAME\Documents\VlkApps\Your-Project\data folder. You can create subfolders, however to avoid missing textures when exporting, all assets must be contained within the data folder.
F) Application Template Folder
- Displays the templates contained in your project.
G) Refresh
- Refreshes the data folder for newly added and overwritten files.
Timeline & Outliner
Timeline
Adjacent to the Right section, you will find the timeline of the entire project and individual time bars for each Entity, Action and Event that is within the current level.
Outliner
On the Left side of the Timeline Tab, the list contains every single Entity, Action and Event that is within the current level. From here, each item can be manipulated in a layered system where components are grouped, in a hierarchical arrangement, such that lower layers provide functions and services that support the functions and services of higher layers.
Above the Outliner, a row of icons are located here to help manipulate both the timeline and the Outliner.

![]()
Icon List
Starting from the Left
- Expand Layers: Expand or Collapse every single layers within the Outliner.
- Isolate: Single out a single selected object within the outliner.
- Play Button: Start the timeline from 0:00.
- Pause Button: Pause at the current position on the play time.
- Stop Button: Halts the entire timeline and reset the timeline play time to 0:00.
![]()
Icon List
Starting from the Left
- Reload Scene: Reloads the entire scene.
- Toggle Time Bars: Display the timeline.
- Toggle Timeline: Hide time bars of the timeline.
- Delete Selection: Delete the selected objects in the Outliner.
- Toggle Visibility Actions: To turn the visibility of the Actions within the Outliner On or Off.
- Toggle Visibility Events: To turn the visibility of the Actions within the Events On or Off.
- Toggle Visibility Animations: To turn the visibility of the Animations within the Outliner On or Off.
- Toggle Visibility Children: To turn the visibility of the Children of Hierarchy within the Outliner On or Off.
- Toggle Visibility Camera: To turn the visibility of the Camera within the Outliner On or Off.
- Toggle Visibility Lights: To turn the visibility of the Light within the Outliner On or Off.
Inspector
Within the Inspector window, this is the location to go to if you need to setup any in-scene settings of individual selected object such as Name and Identity, Timeline Setting, Transform Coordination, Layer Settings and many more other specific settings based on the type of asset.
Material Editor
The Material Editor allows you to add your texture maps to individual Entities. It also provides the ability to directly manipulate how much a texture can affect in-scene.
For more details, Click Here.
Windows
Every Menus and Windows mentioned above can be visibly toggled and eventually the entire menu setup can be customized to your own preference.
Customize User Interface

- To Undock, right click on the tabs of the window and select Undock. (Image Above for Reference)
- To Dock windows, hold the Ctrl and Left Mouse Click on the window dock.
- Drag the window to the Square Icons that display the window orientation within the UI.
- Release both buttons to dock the newly placed windows.
- (Image Above for Reference)